
Hi. I’m Paul, and I haven’t lifted any heavy weights since February.
I had a pretty decent garage gym set up, with an ancient Lamar power rack and a few hundred pounds of plates that I scavenged from a bankrupt gym. It took up about a third of my garage, what with the bench, plate tree, rack, and so on. This was good.
Then I sold the rack and moved into a house with a smaller garage, only half of which I could use. “No problem,” I thought. “I’ll join the local gym.” This was actually really nice; on one hand, I had to drive to and from the gym, but on the other I had way better equipment, and more of it, plus it was cheaper than my previous gym membership.
Then COVID. Uh uh, buddy, you’re not getting me in a gym, no matter how many precautions they say they’re taking. I’ve been to lots of gyms and seen my fellow gym-dwellers and… just, no.
So for the rest of the spring, I focused on running and cycling. I occasionally did strength work with my adjustable dumbbells but wasn’t enjoying it so I didn’t consistently do it. There was too much hassle around moving stuff, trying to improvise exercises at a reasonable weight, and so on. I let Matt take the dumbbells back to college when he went back in August, since his gym was closed too.
Now, of course, at any time I could’ve bought a new weight rack, but I wanted to be able to park in the garage, too. Basically I was making excuses.
As winter started to loom larger on the calendar, I finally decided it was time. Erica and I deep-cleaned the garage to make more room on the sides, and I started shopping for a folding weight rack. I ended up buying a Rogue RML-3W. There are other brands, but after surfing around and reading reviews (including this magisterial work) I ordered the RML-3W with the wall stringers. Rogue quoted me 14-30 day shipping, but I had it in 9 days… or most of it, as the kit shipped in 8 boxes. I stacked it all up and waited for a free weekend, which happened to be this past weekend.
The basic installation procedure is straightforward: mount the two horizontal stringers to wall studs, then add the horizontal beams, then add the vertical beams. A few tips I learned along the way:
- The Rogue instructions look like engineering drawings. If you don’t know how to read dimensions on diagrams, you’d better learn.
- Having a chalk line and a 4′ bubble level will make the process much easier.
- my garage has a 4″ concrete footer that sticks out about 1″ past the base of the wall. The dimensions sheet says the bottom stringer is supposed to be mounted 1 5/8″ above the floor, but it turns out that it’s OK to mount it higher if you need to– as long as it’s no more than 18″ above floor level.
- If you mount the bottom stringer higher than the recommended 1 5/8″, don’t raise the top stringer to compensate.
I started by marking the 4 wall studs required for the stringer. You can mount the rack directly to the studs with no stringers, but the stringers make the installation much easier. They are well worth the extra $50.
Next, I laid the bottom stringer in place flush with the top edge of the concrete footer, leveled it, and drilled pilot holes in opposing corners for the lag bolts. Once it was in place, I drilled the remaining pilot holes and put the lag bolts in using a 9/16″ socket. (I couldn’t use my impact wrench because I didn’t have the right adapter.)
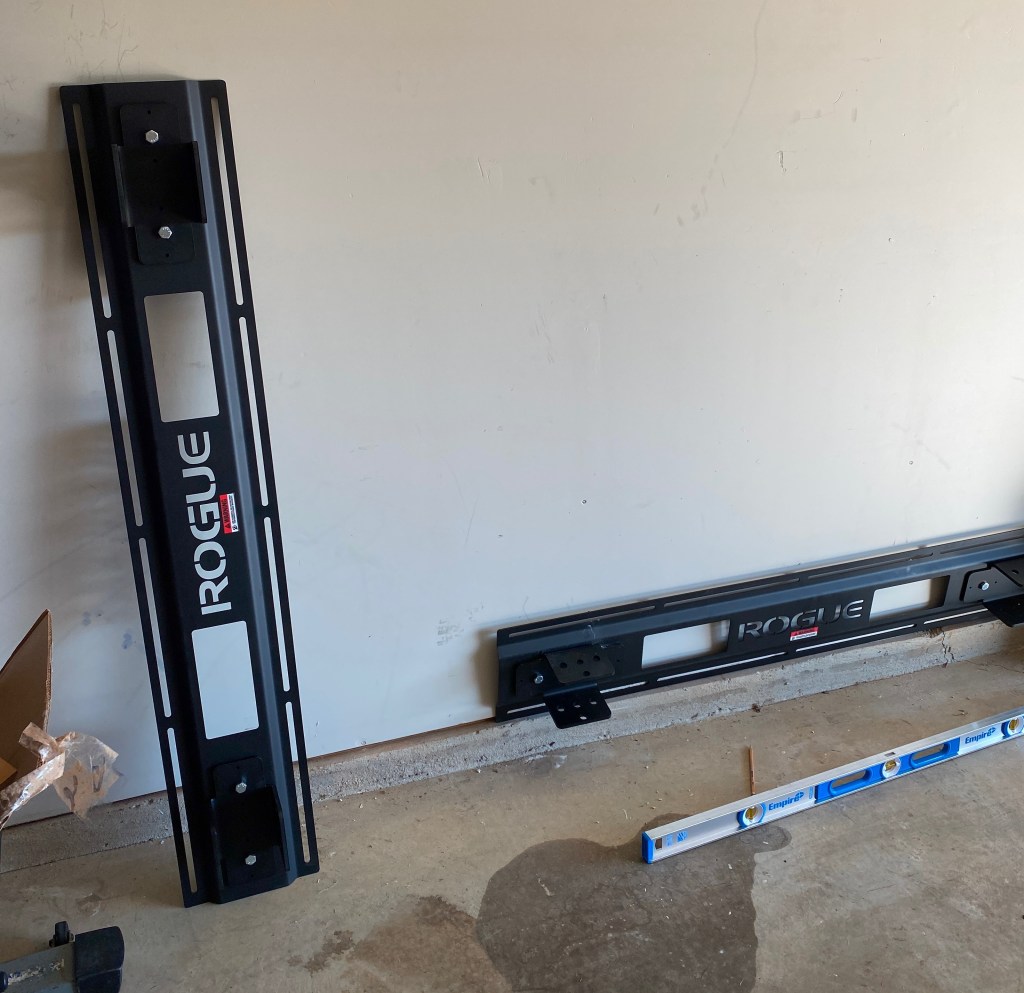
I then measured the recommended height from the floor for the centerline of the top stringer, marked it, and used my level to mark a vertical index line. If I’d had my chalk line this would have been even easier. I then held the stringer in place and drilled one pilot hole for the upper right corner, just to hold it on the wall. About this time, Tom showed up with a 9/16″ impact socket and the real fun started– about 7 minutes later we had both stringers firmly mounted to the wall.
The next step is to add the horizontal supports. This is easier with two people, but feasible with one as long as you don’t drop them. Having a 25-pound piece of 11-gauge steel hit you on the head would ruin your whole day. The supports attach with a big ol’ bolt, but they swing freely until you put the safety pins in. There are holes set to allow you to pin the supports parallel to or perpendicular to the rack, so whether folded or extended, stuff stays where you put it.
The vertical supports were the last step. I was glad to have Tom’s help because these are unwieldy– they’re narrow, tall, and heavy. Rogue ships plastic plugs that go into the bottom of each support to protect the floor. These are slightly oversized and so it will take a good bit of hammering to force them into position– expect to see a few pieces of plastic shrapnel shaved off the outside of the plug when you force it into position.
The last step is the included pull-up bar. This acts as a crossbrace, and is required when using the rack, but it’s also handy if you want to knock out a few pullups, as one does.

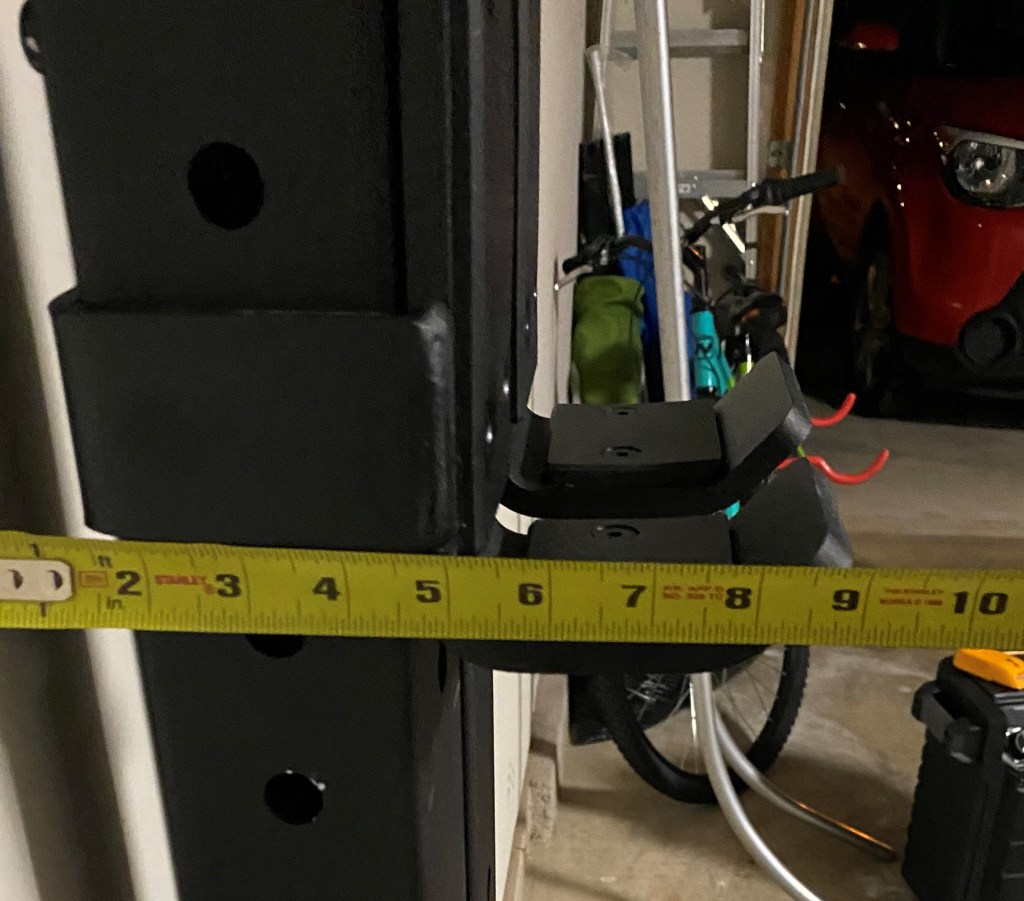
In the photo, you can see several things of interest (besides my stupid shoes): the orange pins are the horizontal rack safety pins, the red ones on either side of the pull-up bar are for retaining that bar, and the ends of the vertical columns are resting flat on the floor. The two J-cups are installed on the vertical supports; since the rack is only 21″ deep when unfolded, you can’t really do any exercises inside the rack. They make a version with longer horizontal supports, but it wouldn’t fit in the space I have.
The rack feels very solid but there is some lateral wiggle. This is to be expected given the design. Overall, though, the design works very well. It was easy to install, it’s solid, and, as promised, it folds to a minimal depth so I can still park my car when I’m not working out.
The only drawback I can see is that there’s no way to attach safety bars or straps unless you buy a set of spotter arms. Rogue’s site makes it sound like their strap kit will work, but of course it won’t because there’s only one place to attach the straps, and you need two. I’m shopping for a set of spotter arms and will eventually post an update once I find some that I like.
The only remaining task is to move the bars and weights from their current home in the mini-storage back here and then boom, it’s game on!


